Order Settings
Configure the default order template, checkout mode, new arrivals window, out-of-stock rules, announcement banners, and customer-facing navigation tabs.
Overview
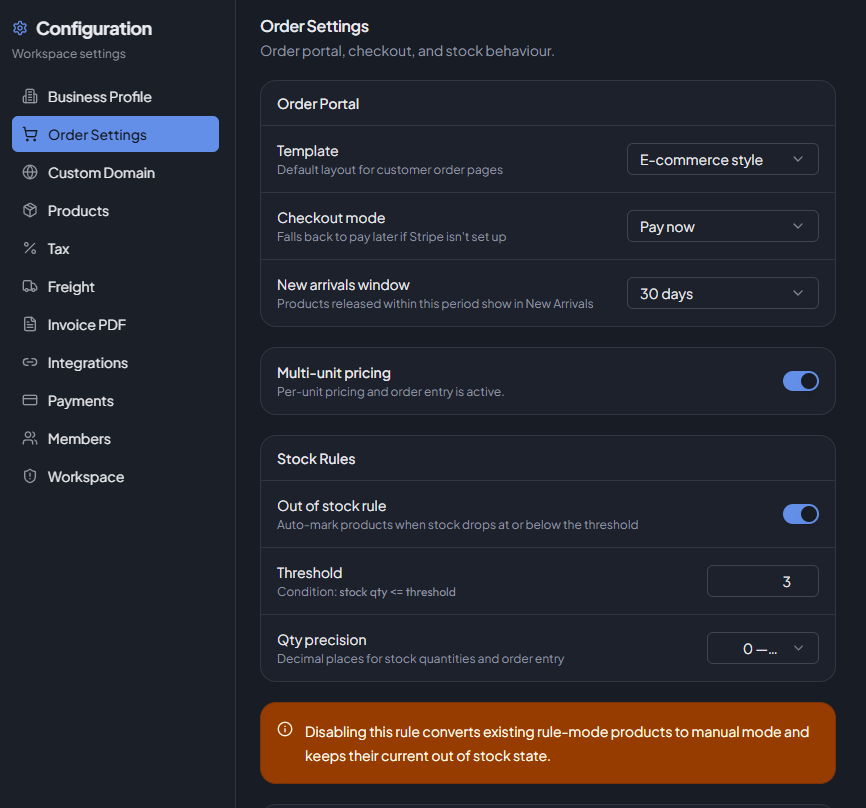
The Order Settings tab controls how orders are processed and how the customer-facing order page behaves. Changes here apply workspace-wide as defaults, and can often be overridden per customer.
Default Order Template
Chooses the layout shown to customers on their order page.
| Value | Description |
|---|---|
| E-commerce Style | Standard product card grid layout. |
| Quantity Grid | Table-based layout optimised for high-volume ordering. |
Priority: Customer-level setting → Workspace default → System default (E-commerce Style).
Default Checkout Mode
Controls whether customers are prompted to pay at checkout or defer payment.
| Value | Description |
|---|---|
| Pay now (card checkout) | Stripe checkout is shown at the end of the order. |
| Pay later (skip checkout) | Order is placed without a payment step. |
Priority: Stripe readiness override → Customer override → Workspace default.
If Stripe is not connected or not fully active, orders always proceed as Pay later regardless of this setting.
New Arrivals Window
Sets how many days after a product's release date it is considered "New" and shown in the New Arrivals tab on the order page.
Options: 7, 14, 30, 60, or 90 days.
Out of Stock Rule
A workspace-wide rule that automatically marks products as out of stock when their stock quantity falls at or below a threshold.
| Setting | Description |
|---|---|
| Enable Rule | Toggle the rule on or off. |
| Threshold | Products with stock qty ≤ threshold are treated as out of stock. |
| Stock Qty Precision | Number of decimal places for stock quantity display and input (0–4). |
The rule only applies to products whose Out of Stock Mode is set to Rule. Products on manual mode are not affected.
Disabling the rule converts all rule-mode products to manual mode and keeps their current out-of-stock state.
Entry Security
Controls how buyers are greeted and verified when they open an order link.
Confirmation step
Always active. When a buyer opens an order link, they see a short welcome screen before the product catalogue loads:
- Customer link —
Welcome back, {business name}with a Yes, Start Ordering button. - Workspace link —
Welcome to {workspace name}with a Start your order button.
One click is all that is needed. No email or code entry is required in this mode.
The confirmation screen is skipped automatically when a buyer returns from a payment page or resumes a saved draft in the same browser session.
Strict Security Mode
An optional toggle that adds email verification before the order portal opens.
| Link type | How strict mode works |
|---|---|
| Customer link | A verification code is sent to the customer's saved email address. The buyer selects the matching image from four options to proceed. |
| Workspace link | The buyer first enters their email address. A verification code is sent, and the same image-match step follows. |
Turn on Strict Security Mode only when you need to restrict access to confirmed buyers. For most food-service, wholesale, and field-sales accounts the default confirmation step is sufficient.
When Strict Security Mode is off, the setting shows Active (confirmation step is always on). When it is on, the setting shows Strict mode on.
Enable Multi-Unit Pricing
Turns on full multi-UOM (unit-of-measure) pricing so products can have different prices per unit (box, carton, pallet, etc.).
When disabled, only the EACH unit is used (legacy compatibility mode).
Manage which unit codes are enabled in the Products tab.
Announcement Banners
Rotating text banners displayed at the top of the customer order page. Up to 8 banners can be active at once.
Each banner has:
| Field | Description |
|---|---|
| Message | The text shown to customers (max 100 characters). |
| Color | Banner background: Default, Amber, Green, Blue, or Red. |
| Active | Toggle to show or hide the banner without deleting it. |
Adding a banner: Type a message in the input field and click Add (or press Enter).
Editing: Click the pencil icon on a banner row to edit its message inline. Press Enter or click the checkmark to save, Escape to cancel.
Deleting: Click the trash icon and confirm the delete dialog.
Order Web Navigation
Configures which tabs appear on the customer-facing order page and their order.
Virtual Tabs
Three special tabs are automatically populated from product data:
| Tab | Description |
|---|---|
| New Arrivals | Products released within the New Arrivals window. |
| Past Orders | Products this customer has previously ordered (customer-specific links only). |
| On Sale | Products with an active promotion for this customer. |
Each virtual tab can be:
- Enabled or disabled.
- Given a custom display label (2–24 characters).
- Set to Hide when empty — the tab is hidden if no matching products exist.
Tab Order
Drag and drop tabs to set the order they appear on the order page. The All Products tab is always pinned first and cannot be moved.
Category tabs from your product categories are also shown here and can be reordered alongside virtual tabs.
Inactive categories are automatically removed. New categories are appended to the bottom until reordered.
Preview
A live preview shows which tabs will be visible based on current settings (enabled tabs only).
AI Settings
Controls the AI assistant behaviour for your workspace. These settings are also available at Configuration → AI → Settings.
| Setting | Default | Description |
|---|---|---|
| Dashboard AI | On | Shows or hides the AI panel for dashboard users (Admins and Owners). |
| Portal AI | On | Shows or hides the AI chat button on the customer order portal. |
| Alias Learning | On | Allows portal customers to confirm and save new product alias mappings via AI chat. Turn off to prevent new aliases from being created by customers. |
| Knowledge Base | On | Injects your workspace Knowledge Base into AI responses on both the portal and dashboard. Turn off to limit AI answers to product data and built-in documentation only. |
All four toggles require a
GROQ_API_KEYto be configured in the environment. If the key is absent, AI features are inactive regardless of these settings.
See AI Assistant Overview for setup and usage details.